Eyeshadow for Beginners | Simple Eye Makeup for Beginners
Every day, we scroll through a million different eye makeup looks, loving them and trying to re-create them for ourselves at home. Somehow, however, they very rarely look as we would hope and we’re not even close to resembling the flawless image we see before us. Why? Well, most of us, are not professional makeup artists and don’t exactly know the basics when it comes to applying different eye makeup looks. Well fear not, we have assembled 15 of the best eye looks out there with accompanying step by step instructions on how to complete each look with ease! Enjoy ladies, you’ll look fabulous!
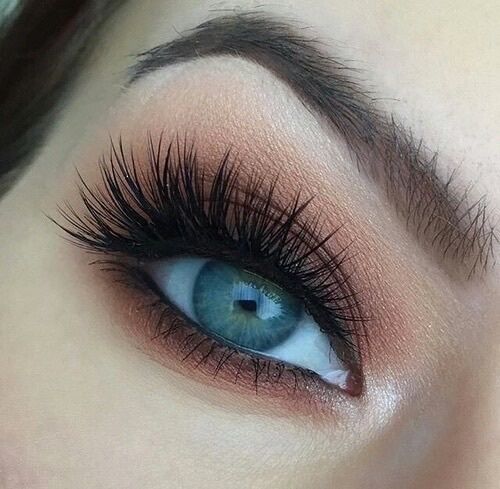
1The Smokey Eye
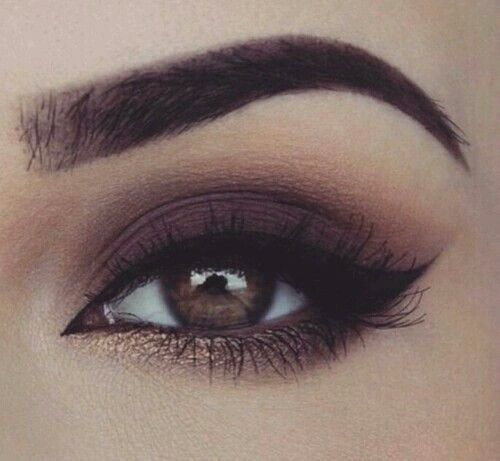
1. Prepare your eyelid with a primer to give the makeup something to cling to.
2. Apply your concealer of choice to the lid and under the eye to get a nice even color ready to apply the shadow.
3. Using an eyeshadow brush, apply black or brown eyeshadow to the outer corner of your eye and in to the natural crease of your eyelid.
4. Blend out the eyeshadow with a larger fluffier brush to get rid of any harsh lines.
5. Apply eye liner all the way along your top lash line and underneath your bottom lash line.
6. With your bigger brush, blend the liner and shadow together until you can’t see where they meet.
7. Curl your lashes and apply jet black lengthening mascara.
2Coloured Under Eye Liner
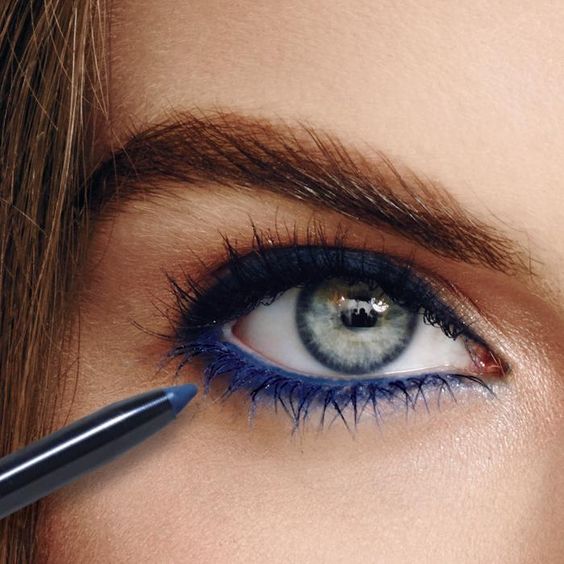
1. Choose a color that compliments your eye color rather than matches it. Using blue for blue eyes, for example, can look overwhelming rather than working to enhance your eye color. Try greens and reds for brown eyes, and pink or red for blue for example.
2. Choose your liner, a pencil or crayon type is usually the best option as it is super easy to blend.
3. Apply your usual eye make up, including liquid eyeliner on the top lid, and mascara.
4. Apply the liner under your eye all the way along, as close as you can get to the lash line.
5. Use a thin angled brush to smudge the liner without pulling the color below the lash line.
3The Cat Eye
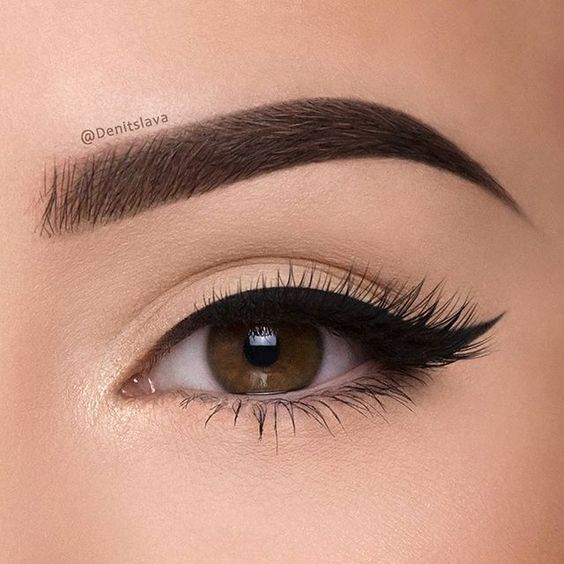
1. Prime your lids to ensure your flick will stay all day.
2. Choose your eyeliner. Gel or liquid liner works best as they are precise and smudge proof to give you the ultimate flick!
3. With your eye slightly closed, sticking to your upper lash line, draw a thin line all the way along in to a flick. You’ll achieve this by imagining your bottom lash line extends upwards and drawing along the line it would follow.
4. Starting from the tip of your flick, draw just slightly above this line, backwards towards your eye to create a thicker line.
5. Use the thinnest part of your liner pen or brush to carefully fill in the gap between the two lines.
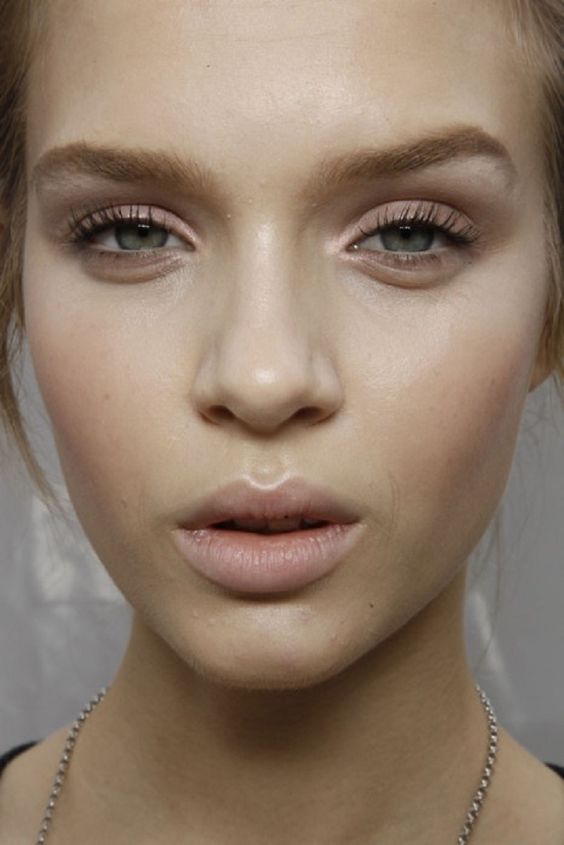
4Natural Eyes/ No Makeup Makeup
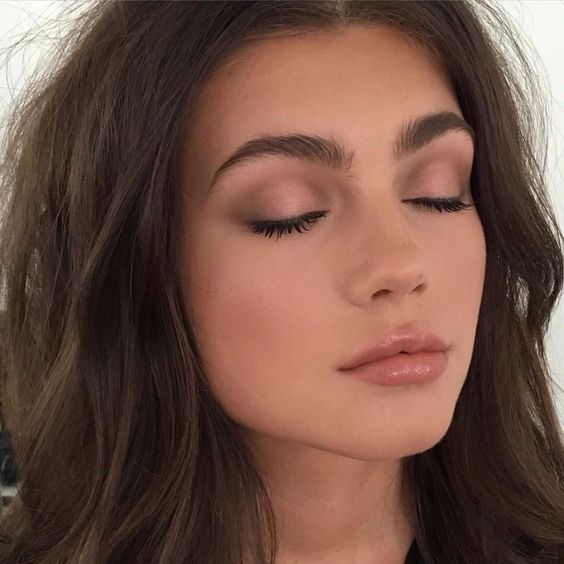
1. Prime your lids and apply a very light dusting of nude eyeshadow.
2. Use a light fluffy brush to apply a slightly more brown shade to the natural crease of your eyelid.
3. Curl your lashes.
4. Apply a clear mascara to your lashes for moisture and conditioning.
5. Finish with a very light layer of brown mascara to your upper lashes and just touch the wand lightly on to your lower lash line to define.
5Bronzed Goddess
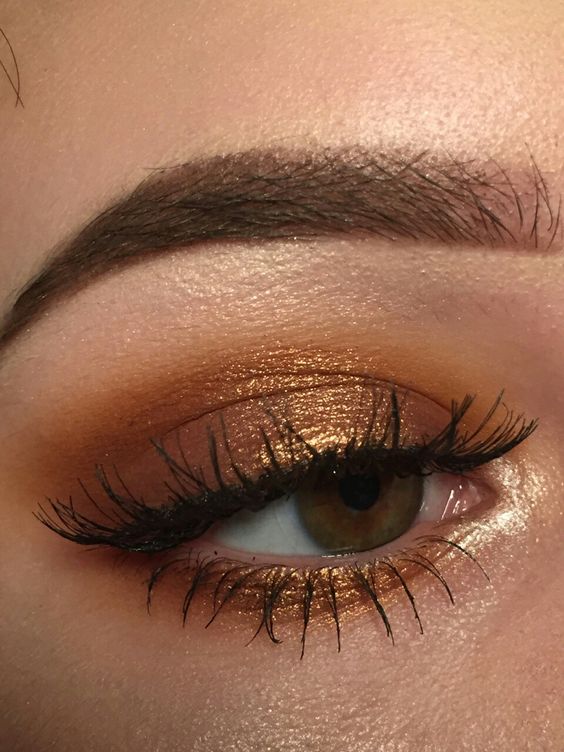
1. Prime your lids and dust on a gold or brown, glitter based eyeshadow along your bottom lash line and on your eyelid to just above the crease.
2. Curl your lashes and apply a clear mascara for moisture.
3. Use a lengthening mascara to enhance the length of your top and bottom lashes to their longest point.
6Brown Pencil Liner

1. Make sure your pencil is sharpened so that you can get nice and close to the lash line.
2. Now the same way you apply your liquid liner for the cat eye, draw a line along your top lash line and flick upwards following where your bottom lash line would extend to.
3. Follow beneath your bottom lash line with the pencil to meet the bottom of your flick.
4. The key now is to blend. Use an angled brush to get that smokey effect and finish with a very light sweeping of dark brown mascara.
7Glittery Shadow
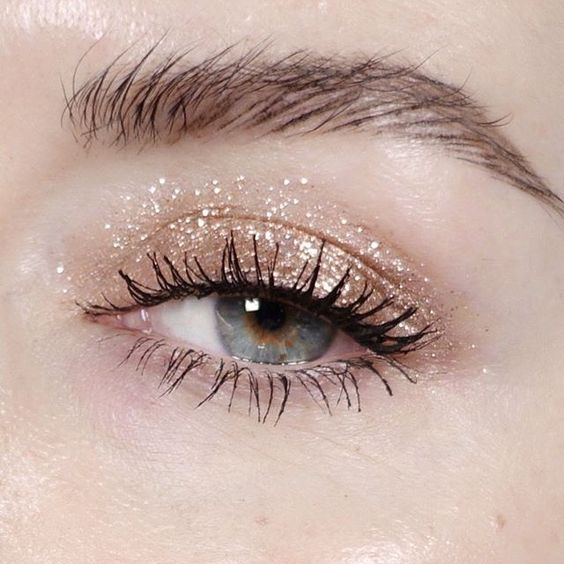
1. Prime your lids.
2. Whilst the primer is still tacky, use your finger to lightly pat your glittery eyeshadow over the entire lid up to just above the crease.
3. Once this has dried, gently curl your lashes and sweep on some jet black mascara to really highlight the sparkle.
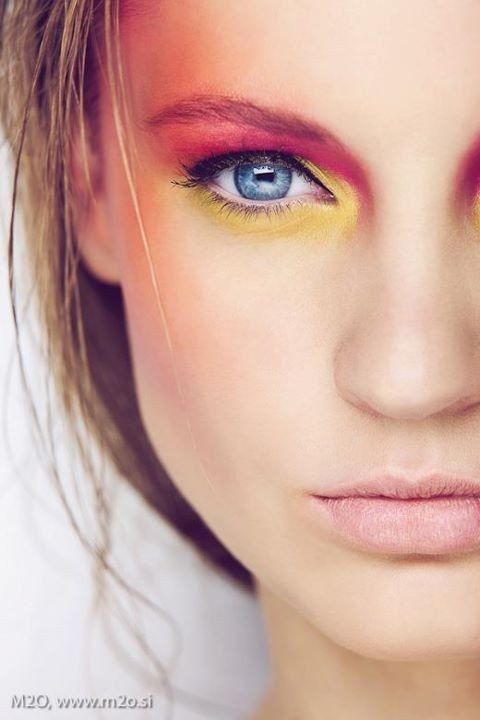
8Ombre Eyeshadow
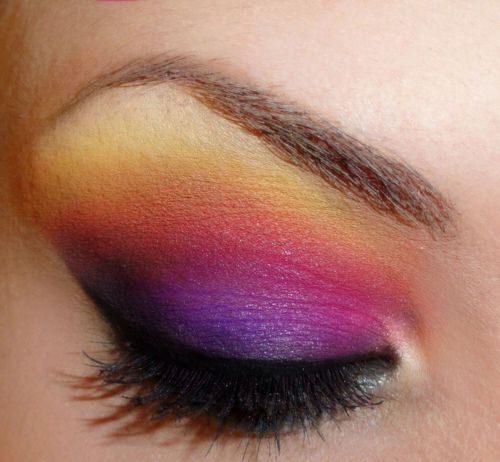
1. Get creative and choose some bright colors that blend well in to one another, like this yellow, pink and purple for example.
2. Apply your lightest color on to your pre-primed lid with light sweeping motions.
3. Go in with your second darker color, applying to the crease of your lid using a back and forth sweeping motion to help blend the two colors.
4. Your third and darkest color should be applied to the lowest part of your lid right to your lash line.
5. Use a clean fluffy eyeshadow brush to blend all of these colors together but keep the motion side to side rather than upwards. This will blend the edge of each color in to the other to create a smooth color transition.
9Mascara Only
1. Simply curl your lashes and add a coat of clear mascara to moisturize your lashes.
2. Using a lengthening mascara with a plastic tooth wand, swipe a few licks of mascara from root to tip wiggling the wand as you go to really separate your lashes.
10False Lashes
1. Prime your lids and apply your chosen eye shadow, you may find the lashes easier to apply if you don’t apply the shadow all the way to your lash line as the powder can often dry out the glue.
2. Measure the lashes against your own and snip off any excess where the false lashes are longest, towards the end of the lash strip.
3. Bend the lashes into a curve for a few seconds so they’re not in a straight line, they’ll be easier to apply like this as they’ll hug the lash line.
4. Apply the glue to your lashes and leave for 30 seconds until it’s tacky, they will stay on much longer if you do!
5. Curl your own lashes and (carefully) use your tweezers to apply your lashes along the natural lash line. You can always use the blunt end if you find this easier.
6. Apply mascara for more drama and only if you are using the lashes once.
7. Finish off by using a liquid liner to fill in any white gaps on your lash line once the glue has completely dried.
11Defined Brows
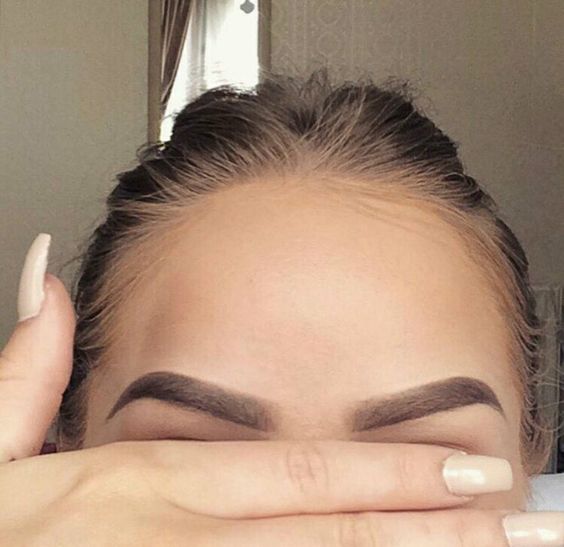
1. Before combing your brows into their desired shape, use a clear mascara to comb them all upwards, you’ll get a more natural looking shape, condition your brows and your brow makeup will remain longer.
2. Comb your brows into their desired shape.
3. Using your sharpened brow pencil, create light flicking motions that follow the natural shape of your brow and the individual hairs, ignoring the first few hairs furthest in (closest to your nose). Do this most of the way along but don’t touch the very ends of your brows, this will give them natural definition without creating a definitive line that would make them look drawn on.
12Liquid Glitter Liner

1. Follow steps 1-5 from the “Cat Eye” look only this time using a glitter liner.
2. Using a glitter based shadow of the same or similar color to your glitter liner, use an angled brush to sweep the eyeshadow along below your bottom lash line and dab a little by the inside corners of your eyes. This will enhance the glitter liner and surrounding your eyes in glitter in this subtle way will really make them sparkle!
13Spring Brights
1. Don’t be afraid to go all out and choose colors you’d usually steer clear of in the winter months. We would suggest trying coral for blue eyes, silver for grey eyes, purple for green eyes, and pink for brown eyes.
2. Apply the shadow all over the lid and below making sure to blend out the edges.
3. Finish off this bold look by curling your lashes and adding a little black mascara to your top and bottom lashes to amplify the brightness of your chosen color.
14Dark Shadows
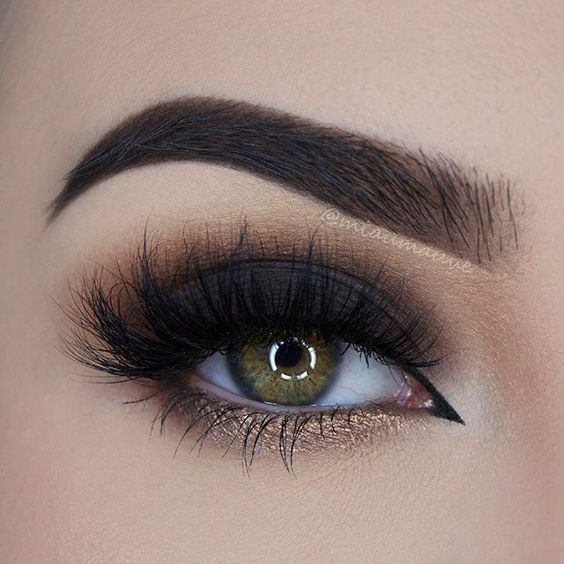
1. Once you’ve chosen your dark eyeshadow color and primed your eyes, select an additional color that is a shade lighter. For example if you’re going for black, select a dark brown.
2. Using your lighter shade, sweep this all over your lid to just above the crease and blend it out.
3. Now go in with your darkest shade and apply all over the lid making sure to stop at the crease.
4. Where your darker shade finishes and you can see your lighter shade, blend them together with a brush using side to side sweeping motions so there is not a definitive line where one color stops and the next begins. This will give the shadow a softened edge and avoid it looking harshly applied.
15Eyeshadow Sticks

1. These can be applied straight on to your lid as they have a naturally creamy texture. Go straight in with your first colour and apply all over your lid.
2. Using a slightly darker shade, apply just in to the outer crease of your lid.
3. Lightly blend with your ring finger to create a natural looking effect.
4. Apply a light sweep of mascara.
16Glitter and Eyeshadow Makeup
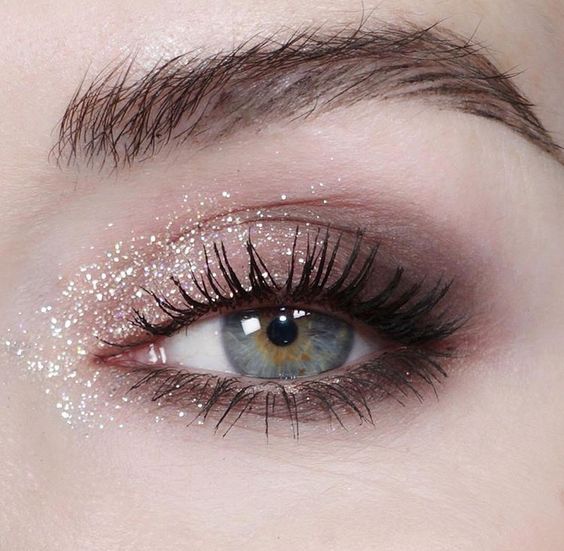
Another take on the glittery eyes look, only this time you’ll apply the glitter on your inner upper lashline and tearduct and then smudge a smoky eyeshadow at the end of the lids the lower lashline and upper V.